PSBI + Planning Center
Set up Planning Center for background checks
Configure the Compliance custom fields, the Background Check workflow, authorization, and the event subscription that starts a check.
Overview
Integration details
| Property | Value |
|---|---|
| Integration type | API | Webhook-triggered |
| Authentication | OAuth 2.0, authorized once by a Planning Center administrator |
| Sync frequency | Event-based — fires when a card reaches the trigger step |
| Fields read | Person identity and contact details, Role, Optional Tags |
| Fields written | Compliance status on the person's record |
Required roles
Your Planning Center administrator
- Create the Compliance custom fields
- Create the Background Check workflow and its two steps
- Approve the PSBI authorization link
- Create the workflow event subscription
PSBI
- Register the connection for your organization
- Read your workflows, steps, and field IDs
- Map each role to the right screening package
- Test the connection and review a dry run with you
Before you begin
You'll need:
- A Planning Center administrator who can manage People workflows, custom fields, and integrations.
- The list of roles you screen differently, and any add-on requirements such as driving or working with minors.
- Confirmation that everyone you intend to screen has a first name, last name, and their own email address, and is not marked as a child.
- A small group to launch with, rather than your whole volunteer roster on day one.
Configuration steps
Create the Compliance custom fields
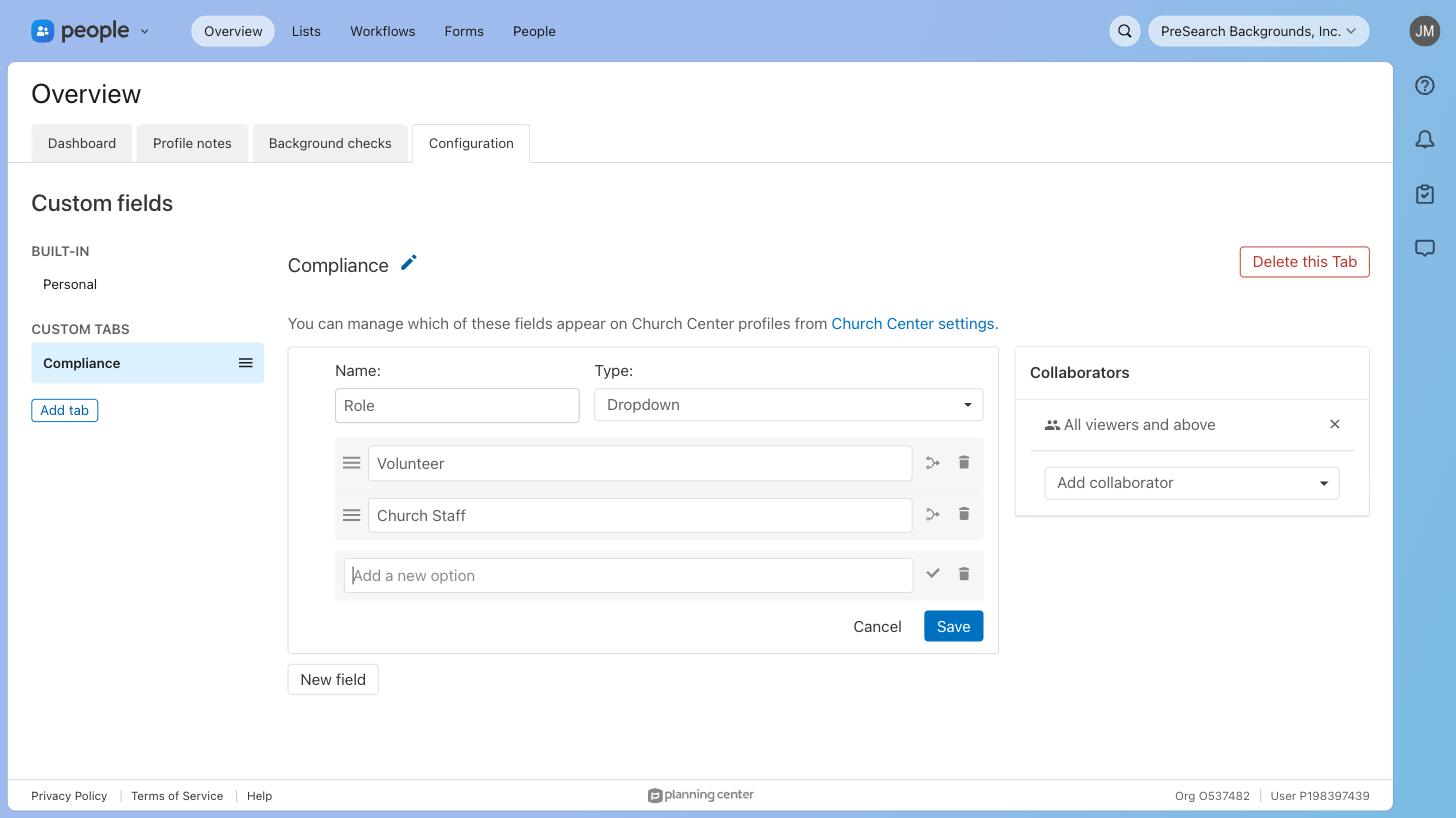
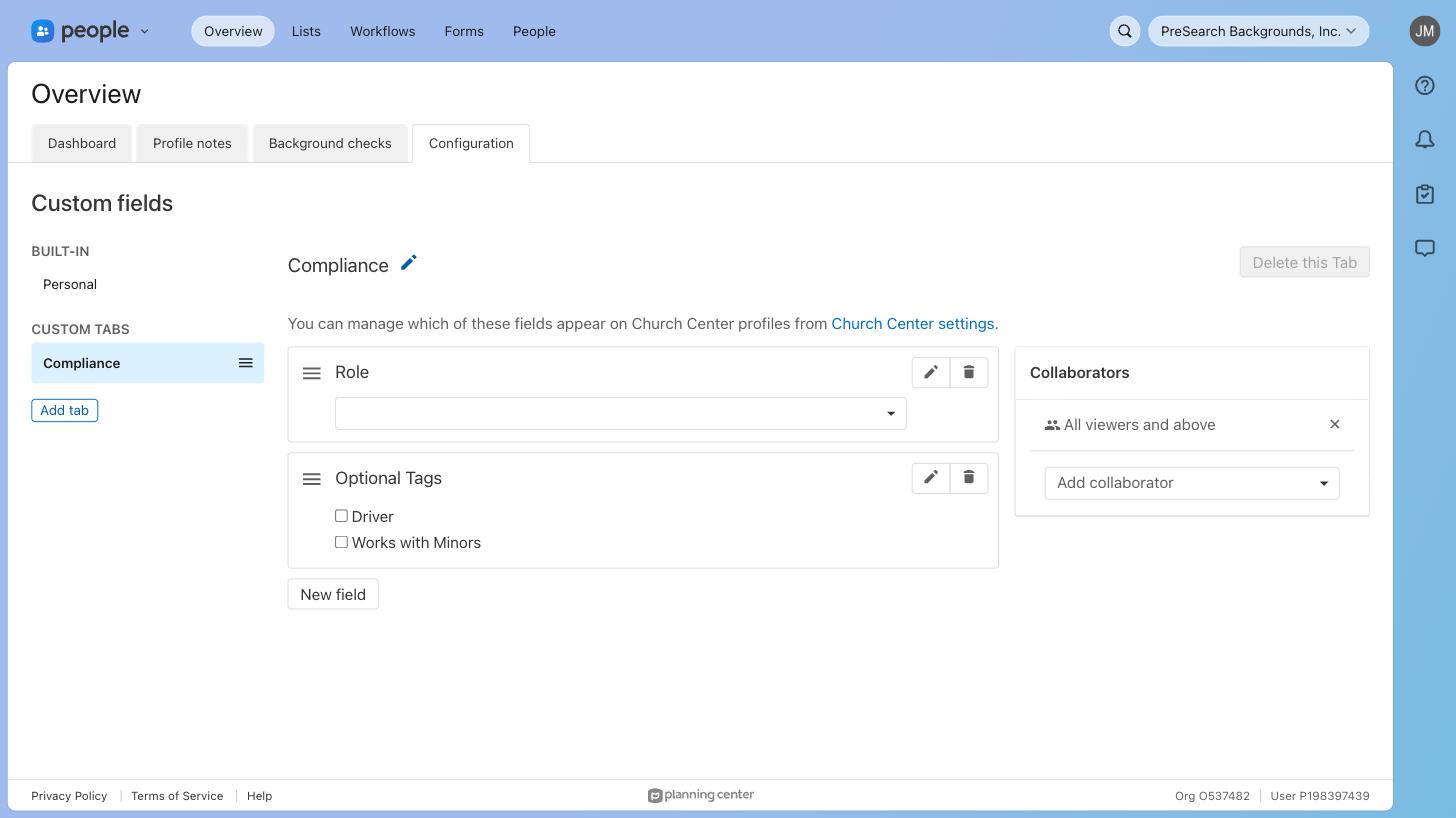
- 1Open Overview → Configuration → Custom fields. Select Add tab and name it Compliance.
- 2Add a field named Role with type Dropdown, then add one option per group you screen differently — for example Volunteer and Church Staff.
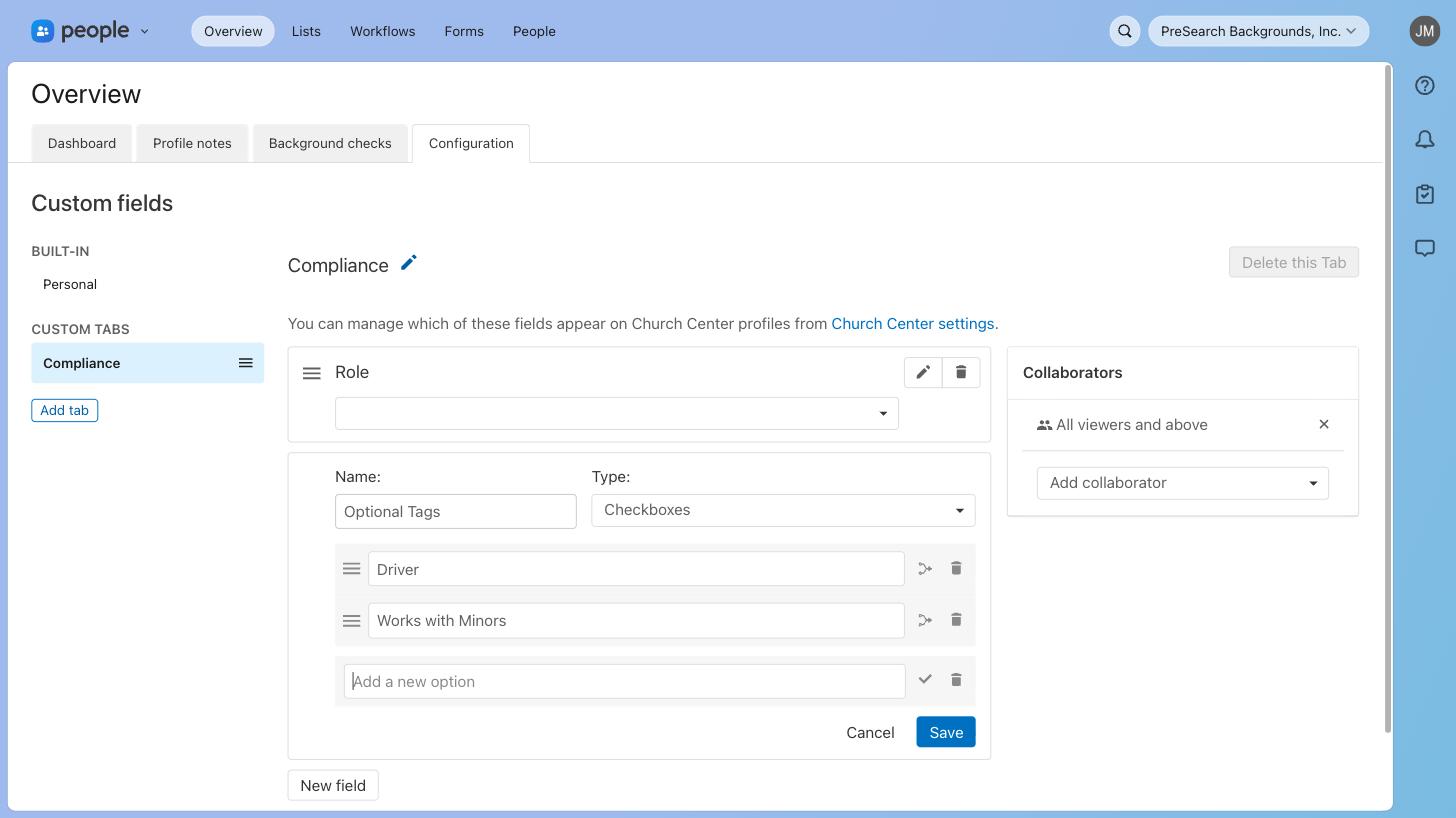
- 3Add a second field named Optional Tags with type Checkboxes, and add an option for each add-on requirement — for example Driver and Works with Minors.
Create the Background Check workflow
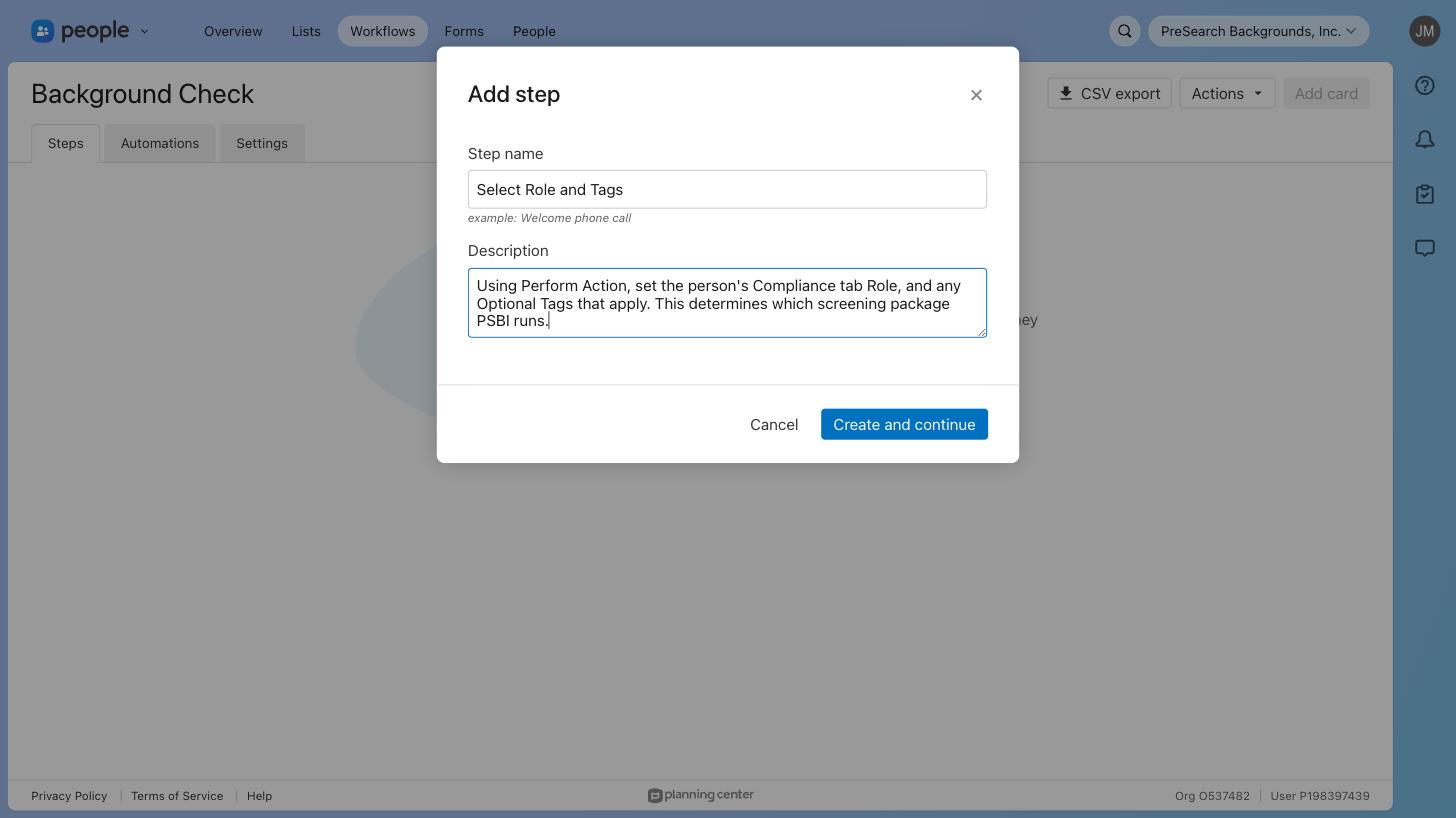
- 1Open Workflows and select New workflow. Name it Background Check.
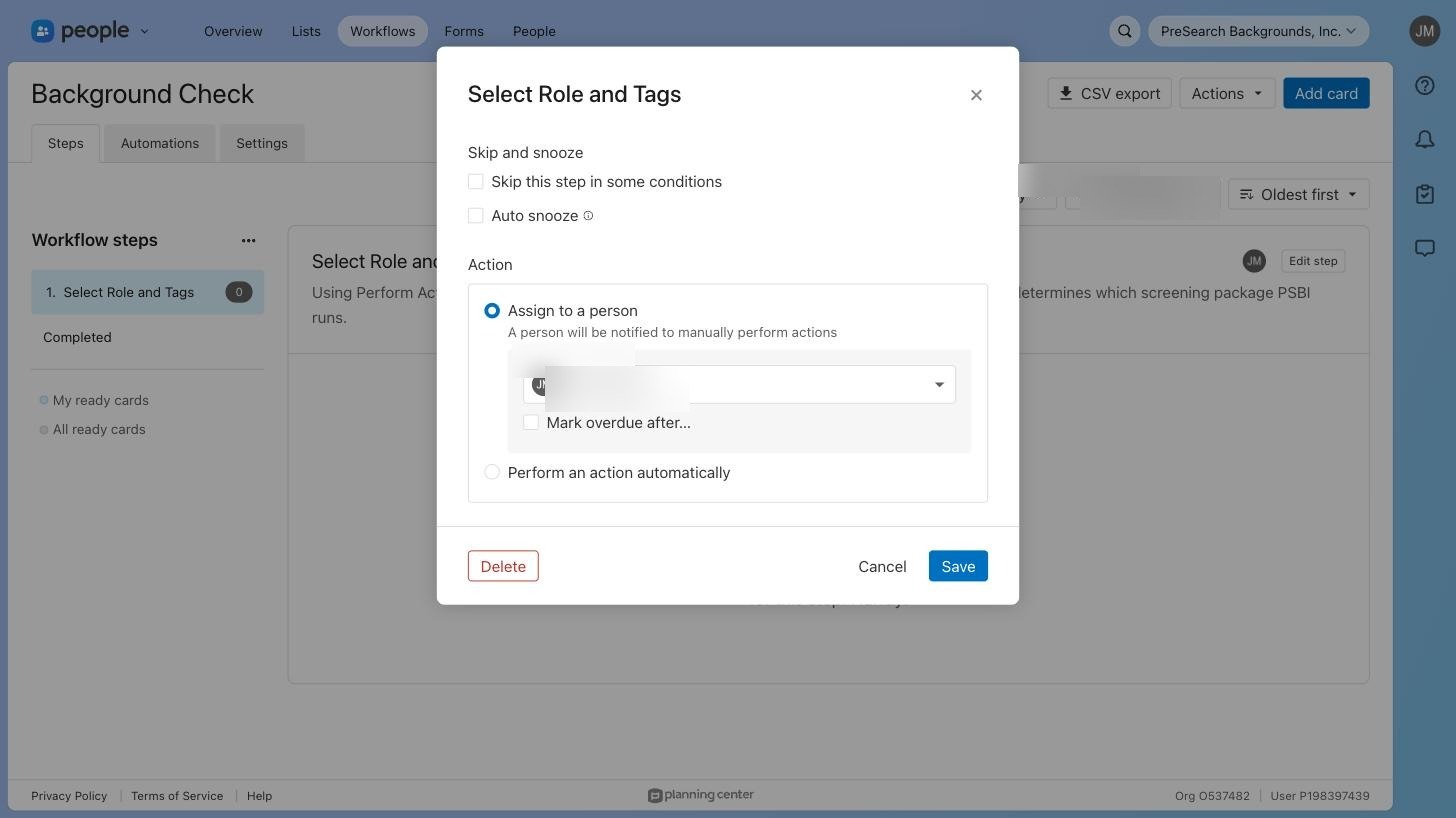
- 2Add a first step named Select Role and Tags. Add the description: Choose the person's screening role and any additional requirements, then complete this step.
- 3Assign Select Role and Tags to the person who oversees screening.
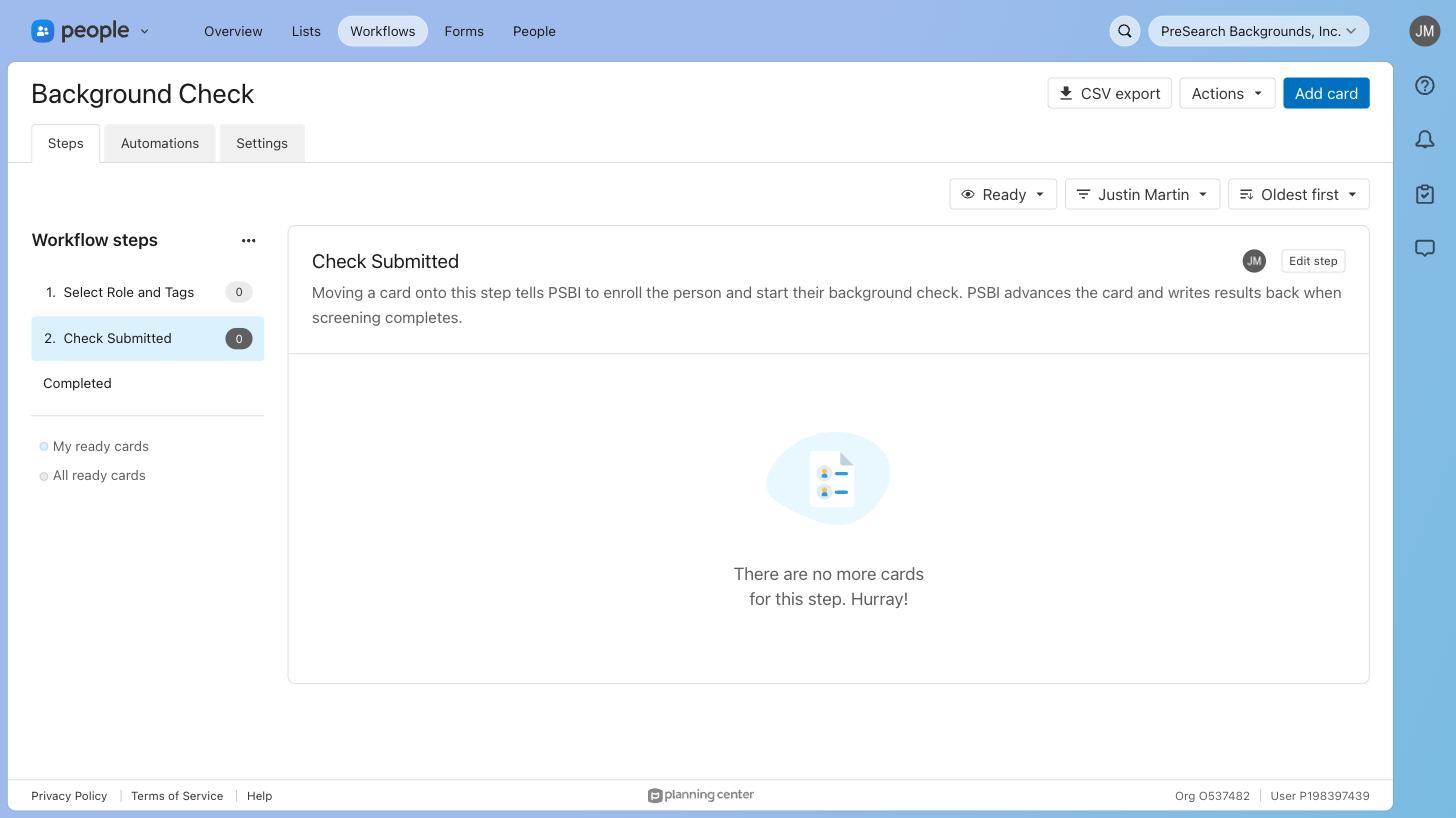
- 4Add a second step named Check Submitted. A card arriving here starts the check.
Authorize PSBI
- 1Your implementation lead sends you an authorization link. Open it while signed in to the Planning Center account that administers your People workflows.
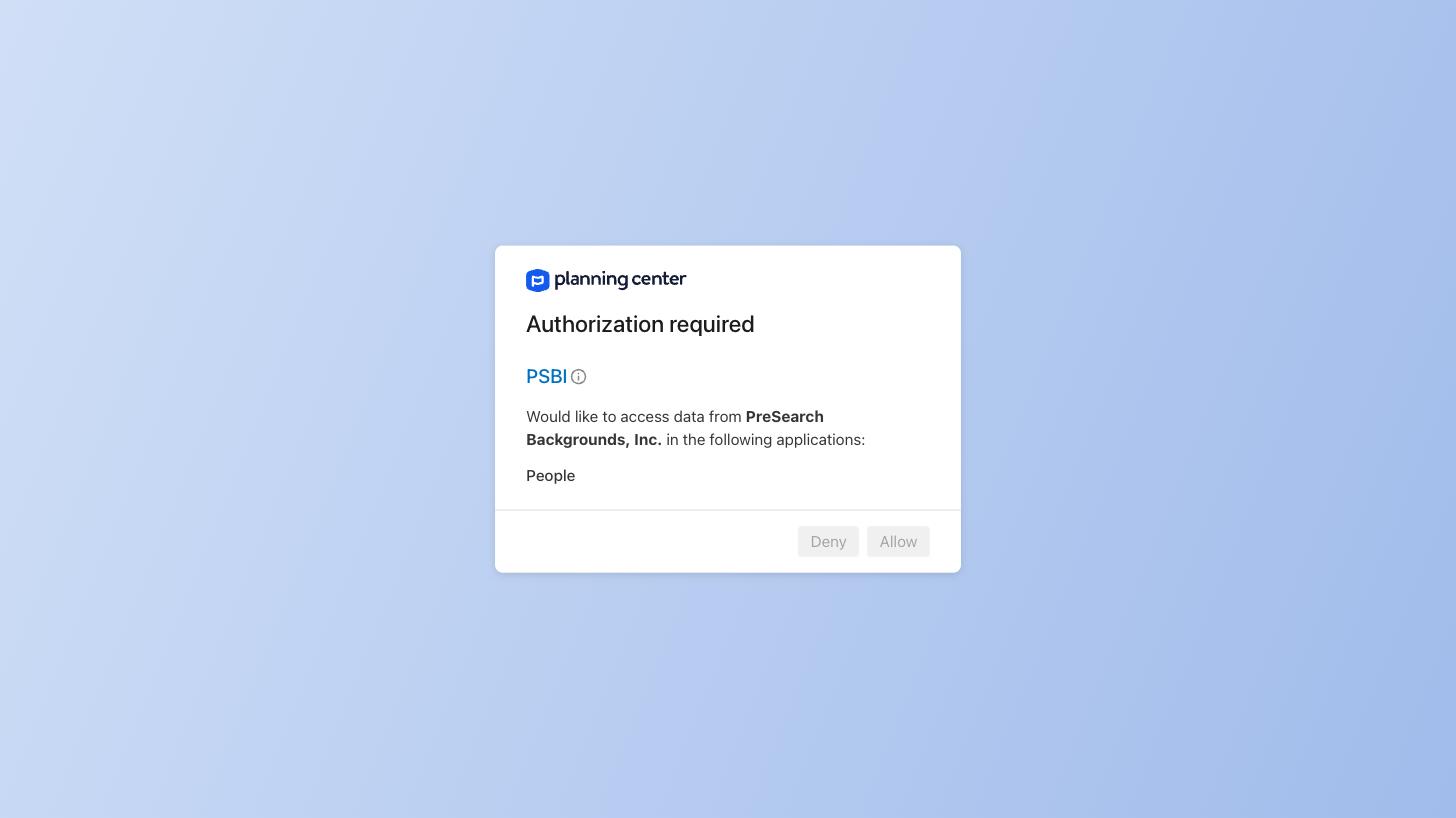
- 2Review the request. PSBI asks for access to People only, and the screen names your organization so you can confirm you are approving the right one.
- 3Select Allow. You are returned to a confirmation page, and access is now tied to your organization and revocable by you at any time.
Create the event subscription
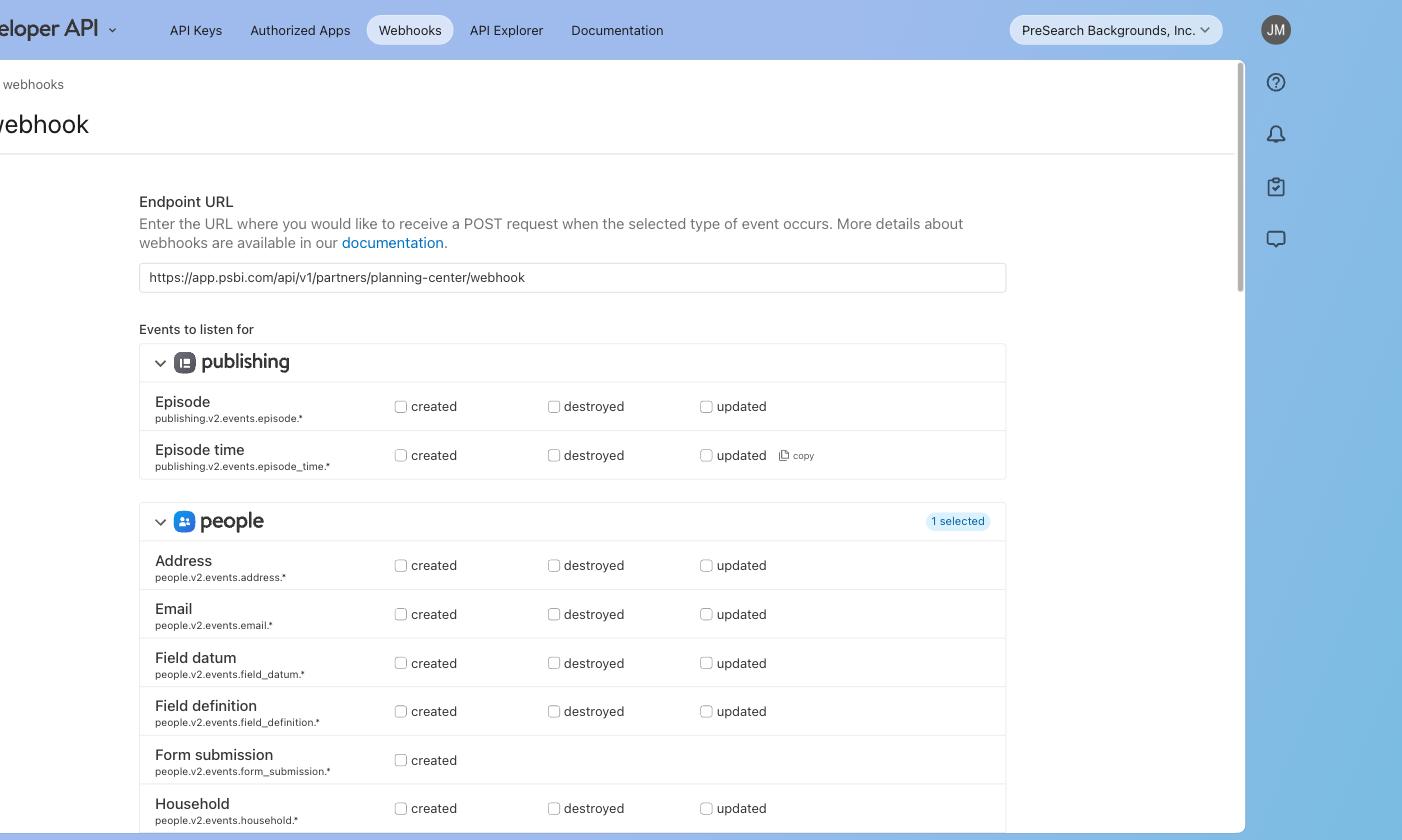
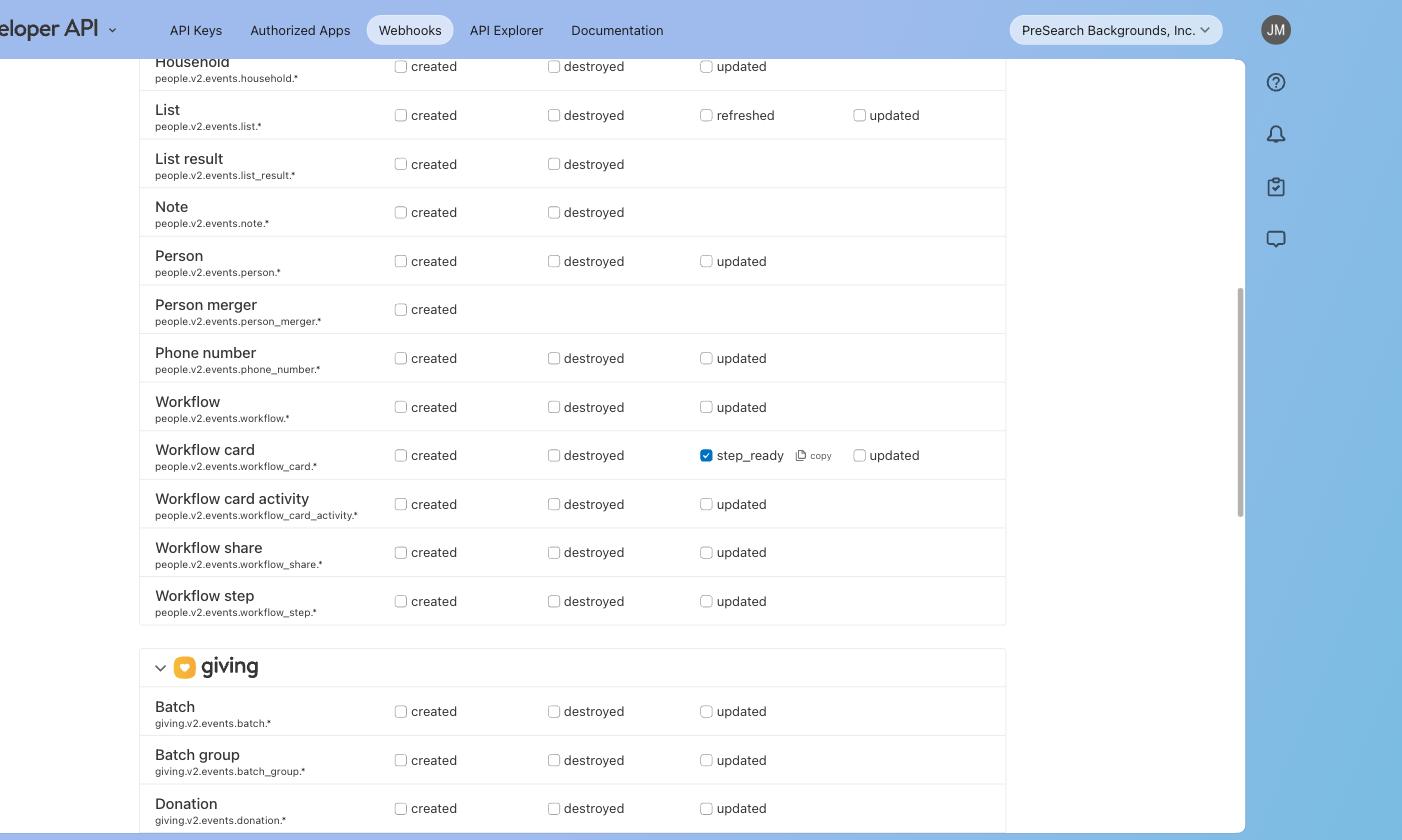
- 1Open the Planning Center Developer area and go to Webhooks. Select Add.
- 2For Endpoint URL, enter this shared PSBI address. It is the same for every Planning Center organization; your organization-specific connection is established separately when you authorize PSBI:
https://app.psbi.com/api/v1/partners/planning-center/webhook - 3Under people, find the Workflow card row and tick step_ready only. Leave every other event unticked, then save.
Validation
Validate before launch
Run these checks with your PSBI implementation lead using test people. Do not go live until the full path works once.
Once it is running
Your team adds a person to the workflow, sets their role, and completes the step. Everything after that happens on its own — the person is invited, completes their own information and consent, and the result appears on their Planning Center record.
Data sync
| When | Direction | What moves |
|---|---|---|
| Card reaches Check Submitted | Planning Center → PSBI | Planning Center sends a step_ready event. PSBI acts only on cards that reached the exact trigger step. |
| Request is created | Planning Center → PSBI | The person's identity and contact details, and their Role and Optional Tags, which select the screening package. |
| Person completes intake | PSBI → Planning Center | Status on the person's record updates as screening progresses. |
| Screening completes | PSBI → Planning Center | The final status is written back to the person's record. |
Troubleshooting
I cannot find Webhooks in Planning Center.
Webhook subscriptions live in the Developer area and are created under a specific user account. Sign in as an administrator who can manage integrations for the organization. If the option is still unavailable, contact Planning Center support.
A person reached the step but nothing happened in PSBI.
Check three things in order: the card is on the exact step agreed during setup, the person has a first name, last name, and their own email address, and the person is not marked as a child. Send us the person's Planning Center record identifier and we will trace the event.
The wrong screening package was selected.
Compare the person's Role value against the mapping agreed during setup. Option values are matched exactly, so a renamed or newly added option needs to be shared with us before it is used.
We added a new role or ministry.
Tell us before anyone is moved into the workflow under it. An unmapped role does not silently pick a sensible default, and we would rather add the mapping than sort out a person screened under the wrong package.
Someone was screened before and no new record appeared.
That is expected. A person who already has a background check record has that record updated rather than a second one created, so their history stays on one row.
Need a hand?
Contact your PSBI implementation lead. Include:
- The person's Planning Center record identifier and role
- The workflow step and what you expected to happen
- Roughly when the card moved
Do not send intake responses, report contents, or other screening information by email.